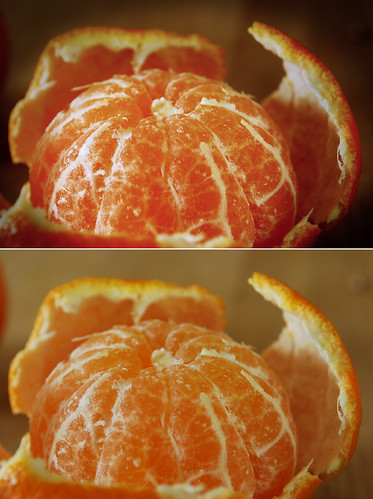
 Probably the last "After and Before" combo that I'll post for a while. They'll all be "Afters" after this. Can you guess how I went from the bottom photo to the top? You can review previous posts on the topic of layering in Photoshop, or just cheat and read the next paragraph.
Selected all and pasted over the original. Selected Soft Light in the Layers menu. This really brought out the details in the rind and surface of the fruit. Used the Elliptical Selection Tool to lasso the ball of fruit, feathered and inverted the selection, then darkened the background in the Levels menu. Placed a blue filter over everything because the color was a little too intense. Ran an Unsharp Mask to further enhance the details.
Mmm. Juicy.
UPDATE: I lied about this being the last "After and Before" that I'm going to post. Tomorrow I'll show you how to make portraits pop using the same layering techniques. For a sneak preview, head on over to Flickr.
Photograph © 2009 James Jordan.


2 comments:
Beautiful details. Looks so tasty!
I really like the richness and depth of the tones in the top one but I think the color of the bottom one is more natural...the top one seems a bit red like a Ruby Red grapefruit instead of an orange. At least on my (calibrated) monitor. It appears even a bit more red on my uncalibrated monitor.
Thanks for sharing the details. I am usually too lazy to do anything more than basic curves adjustment layers.
I have been particularly enjoying your before and afters. I hope to find time to try some of the techniques soon.
Post a Comment