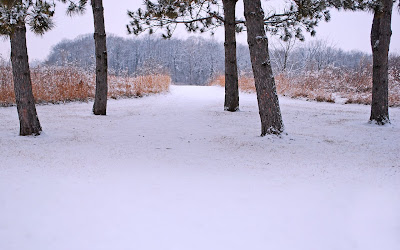
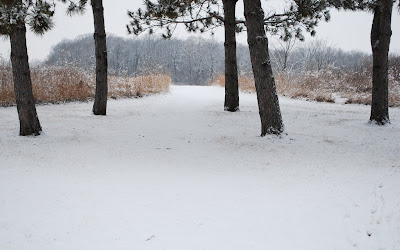
 Seeing the Forest Through the Trees This was taken during a recent walk through a forest preserve not too far from my home. I liked the various angles of the pine trees and the pathway lined with stalks of grasses and weeds leading to the wooded area in the background. It would have been very inviting had the day not been freezing cold and the path icy. Maybe another day.
 This is another installment of "After and Before." Here is the original image, straight from the camera:
 Yeah, I know. Ugh. Here's what I did to fix it in Photoshop Elements:
1. Selected Enhance/Lighting/Shadows and Highlights. Set the sliders thusly: Lighten Shadows 25%, Darken Highlights 6%, Midtone Contrast +17%. Nothing too magical about those numbers. I just liked the resulting "pop" that those settings provided.
2. I ran the photo through Enhance/Unsharp Mask. I've posted a brief tutorial on using Unsharp Mask on my photo advice blog, Ready, Aim, Click. If you want to get good at editing pictures, it's just something you gotta know. I used my default settings (also listed on RAC).
3. Selected Enhance/Color/Hue and Saturation and set the Saturation at +30%. Ooooh.
4. Then, just because I like it, I ran a violet filter on the photo - Filter/Adjustments/Photo Filter/Violet/Density 25%. It just seems to add a bit of winter chill to the image.
That was about it, other than using the Clone Tool to clean up some goop in the foreground snow.
Click on pictures to enlarge. Photographs © 2009 James Jordan.


3 comments:
you rock, jim. thanks for the pointers.
i'm sorry i'm still using ooc shots.someday... someday...
That's cool.
I got the book you recommended and started teaching myself some things tonight (but not on the picture that I posted). Linda
I like what you are doing in your post-processing. I enjoyed your last two blog posts; the lens flare really makes the photo with the red barn. Sweet!
Do you have a link for the use of the clone tool? I've seen it used two different ways, and I'm a little confused.
Keep up the good work!
Post a Comment